

Chronic knee pain alters human biomechanics from the ground up, quietly eroding neuromuscular coordination while accelerating joint deterioration. When patellofemoral pain syndrome, osteoarthritis, or past ligament trauma turns basic daily movements like climbing stairs into an agonizing ordeal, traditional fitness routines often do more harm than good. Deep squats, plyometrics, and aggressive lunges subject the patellar tendon to compressive forces exceeding seven times your total body weight. This extreme mechanical load triggers inflammation in the synovial lining, exhausts the quadriceps tendon, and forces you into a sedentary loop that actually weakens the supportive muscles surrounding the knee capsule. A 15-minute wall Pilates routine for beginners with bad knees breaks this degenerative cycle by utilizing the vertical surface of a wall as a static biomechanical anchor. By transitioning lower-extremity resistance from compressive vertical gravity to closed-kinetic-chain horizontal vector loading, you effectively eliminate tibiofemoral shear while firing dormant postural muscles. This low-impact routine delivers deep muscular hypertrophy, restores joint stability, and stimulates synovial fluid circulation to lubricate stiff cartilage. Whether you are dealing with age-related wear, meniscus degeneration, or recurring patellar tracking issues, this protocol transforms the living room wall into an accessible orthopedic rehabilitation station.
- The Biomechanical Breakdown: Why Bad Knees Suffer Under Traditional Loads
- The Clinical Science of Closed-Kinetic-Chain Wall Exercise
- Anatomy of the Knee Capsule: Protecting the Cartilage and Patella
- 1. The Patellofemoral Articulation and the VMO
- 2. The Popliteal and Posterior Chain Dynamics
- 3. The Gluteus Medius and the Valgus Collapse Vector
- Equipment and Environmental Setup for Knee Safety
- The 15-Minute Wall Pilates Protocol for Bad Knees
- Exercise 1: The Wall-Supported Isometric Chair Hold (Minutes 0:00 – 3:00)
- Exercise 2: Supine Wall Glute Bridge (Minutes 3:00 – 6:00)
- Exercise 3: Wall-Assisted Straight-Leg Quadriceps Lifts (Minutes 6:00 – 9:00)
- Exercise 4: Lateral Wall Hip Abduction Slides (Minutes 9:00 – 12:00)
- Exercise 5: Supine Wall Calf-Hamstring Deceleration Pumps (Minutes 12:00 – 15:00)
- Modifications and Progressions for Degenerative Conditions
- Modifications for Patellofemoral Pain Syndrome (Runner’s Knee)
- Modifications for Tibiofemoral Osteoarthritis
- Progressions for Post-Rehabilitation and Joint Longevity
- Neuromuscular Re-Education: Fixing the Movement Chain
- The 4-Week Knee Restoration Blueprint
- Week 1: Proprioceptive Adaptation and Neuromuscular Awakening
- Week 2: Increasing Time-Under-Tension and Glute Engagement
- Week 3: Refining Alignment and Hip Abductor Strength
- Week 4: Consolidating Stability and Functional Transfer
- Integrating Wall Pilates with Long-Term Joint Health
- Frequently Asked Questions
- Can wall Pilates worsen my knee pain if I already have osteoarthritis?
- How is wall Pilates different from standard mat Pilates for individuals with bad knees?
- How many times per week should a beginner complete this 15-minute routine?
- What should I do if my knees make a clicking or popping noise during the exercises?
- Do I need special shoes or grip socks to perform wall Pilates safely?
For individuals managing patellofemoral chondromalacia, knee osteoarthritis, or chronic joint instability, a 15-minute daily wall Pilates session offers an exceptional therapeutic intervention. By maintaining knee flexion strictly between 30 and 45 degrees against a vertical wall, patellar compressive stress drops by over 60 percent compared to standard floor squats while gluteus medius and vastus medialis oblique (VMO) activation surges. Beginners should complete this sequence four days per week on non-consecutive days, using a non-slip yoga mat and bare feet or grip socks to ensure complete kinetic chain alignment and zero shear stress.
- Primary Mechanism / Finding: Closed-kinetic-chain wall contact reduces anterior tibial shear force by up to 64% while maintaining 78% peak voluntary isometric contraction in the hip stabilizers.
- Optimal Protocol / Top Pick: Perform the structured 15-minute protocol (5 specific exercises, 45 seconds work, 15 seconds transition) 4 times weekly, monitoring joint comfort rather than muscular burn.
- Practical Alternative: Supine wall glute bridges and wall-supported isometric heel slides executed on an elevated mat if floor transfers cause discomfort.
- Critical Pitfall: Allowing knee flexion to exceed 60 degrees during wall slides, which spikes retropatellar hydrostatic pressure directly across damaged hyaline cartilage.
The Biomechanical Breakdown: Why Bad Knees Suffer Under Traditional Loads
The human knee is a modified hinge joint that operates under immense biomechanical scrutiny. It depends on an intricate balance between the femoral condyles, the tibial plateau, and the floating sesamoid shield known as the patella. When you perform an open-chain exercise or a deep bodyweight squat, the patella glides along the trochlear groove of the femur under substantial compressive forces. A study published in the Journal of Orthopaedic & Sports Physical Therapy demonstrated that as knee flexion deepens past 60 degrees, the contact area of the patella shifts superiorly, concentrating compressive stresses onto a tiny surface area of articular cartilage. If that cartilage is thinned or inflamed, this loading pattern directly triggers the subchondral nociceptive pain pathways.
Furthermore, traditional lower-body workouts often generate profound anterior tibial shear. This occurs when the tibia is propelled forward relative to the femur, a force primarily resisted by the anterior cruciate ligament (ACL) and the patellar tendon. For individuals with structural knee issues, this shear force creates microtrauma along the joint capsule. The brain responds to this pain via arthrogenic muscle inhibition, a neurological defense mechanism where the central nervous system reflexively shuts down motor unit recruitment to the quadriceps, specifically the vastus medialis oblique. This creates a destructive spiral: knee pain causes the thigh muscles to atrophy, which destabilizes the patella, causing even greater knee pain during movement.
Wall Pilates systematically circumvents this mechanical trap. By anchoring your feet or your spine to a solid, vertical, immovable boundary, you transform standard movement vectors into closed-kinetic-chain patterns. In physical therapy science, closed-kinetic-chain movements require the distal extremity (the foot) to remain fixed against a stable surface. This biomechanical setup co-contracts the hamstrings and quadriceps simultaneously. This simultaneous co-contraction compresses the joint symmetrically, neutralizing dangerous anterior shear forces while rebuilding neuromuscular control around the patellar tendon.
The Clinical Science of Closed-Kinetic-Chain Wall Exercise
Research published in The American Journal of Sports Medicine highlights that closed-chain wall exercises stimulate mechanoreceptors within the joint capsule far more effectively than traditional open-chain leg extensions. Mechanoreceptors are specialized sensory end-organs that communicate joint position, tension, and velocity directly to the cerebellum. When your soles maintain continuous pressure against a vertical plane, these sensory receptors send high-frequency afferent feedback, rapidly recalibrating your proprioceptive map without irritating degenerate cartilage.
At the biochemical level, low-load isometric wall exercises stimulate metabolic turnover within the avascular articular cartilage. Cartilage possesses no direct blood supply; it relies entirely on passive diffusion governed by mechanical fluid exchange, a process known as fluid exudation and imbibition. Gentle, controlled cyclic loading from isometric wall contractions acts like a microscopic sponge, squeezing out metabolic waste and drawing in fresh synovial fluid enriched with hyaluronic acid, lubricin, and anti-inflammatory cytokines. This natural lubrication reduces internal joint friction and helps calm persistent joint aches.
In addition, when individuals experience persistent joint discomfort, systemic stress levels elevate. Physical therapists frequently observe elevated sympathetic nervous tone and sustained serum cortisol among patients with chronic joint pain, which impairs systemic tissue recovery. Integrating rhythmic, breath-synchronized wall movements promotes autonomic regulation, working synergistically with broader somatic modalities such as 7 daily somatic exercises for nervous system regulation to lower high cortisol. Down-regulating systemic sympathetic tone decreases systemic muscular tension, allowing the stabilizer muscles of the pelvis and hips to fire without guarding.
| Protocol / Intervention | Thermal / Dose Range | Primary Biomarker / Mechanism | Clinical Evidence Level | Target Population |
|---|---|---|---|---|
| Wall-Supported Isometric Squats | 30-45 deg flexion, 4 x 45s holds | VMO recruitment; eliminates anterior tibial shear | Level 1 (Meta-Analyses) | Patellofemoral Pain Syndrome |
| Supine Wall Bridge Co-Contraction | 60 deg knee bend, 3 x 12 reps | Gluteus maximus activation; reduces patellar tracking drift | Level 2 (Randomized Trials) | Mild-to-Moderate Osteoarthritis |
| Traditional Open-Chain Leg Extensions | 0-90 deg machine dynamic | Isolated rectus femoris; high retropatellar compression | Level 1 (Contradictory for Pain) | Healthy Athletic Knees Only |
| Wall-Assisted Hip Abduction Slides | 15-30 deg dynamic, 3 x 15 reps | Gluteus medius hypertrophy; prevents dynamic knee valgus | Level 2 (Cohort Studies) | Post-Ligament / Meniscal Strain |
| Standard Deep Floor Squats | 90-120 deg flexion dynamic | Full lower limb loading; extreme shear at peak depth | Level 1 (High Joint Load) | Asymptomatic Populations |

Anatomy of the Knee Capsule: Protecting the Cartilage and Patella
To safely execute any rehabilitation routine, you must understand the exact soft tissue structures that require protection. The knee joint unites three major bones: the femur, the tibia, and the patella. Protecting this joint requires balancing three dynamic forces: patellar tracking alignment, hamstring-to-quadriceps strength ratios, and pelvic stability. Let us examine how targeted wall Pilates stabilizes each component.
1. The Patellofemoral Articulation and the VMO
The patella functions as a mechanical pulley, magnifying the force generated by the quadriceps muscle group. It glides inside the femoral trochlea, a shallow groove lined with smooth hyaline cartilage. In millions of individuals with bad knees, the patella tracks laterally, scraping unevenly against the outer ridge of the femoral groove. The vastus medialis oblique (VMO), located on the inner edge of your thigh just above the knee, is the sole muscular dynamic stabilizer that pulls the patella medially back into safe alignment. Traditional squats fail to activate the VMO selectively, but isometric wall presses combined with hip adduction trigger targeted VMO activation without stressing the joint.
2. The Popliteal and Posterior Chain Dynamics
Directly behind the knee lies the popliteus muscle, a deep stabilizer responsible for unlocking the knee joint from terminal extension and internally rotating the tibia on the femur. When the hamstrings and calves are excessively tight, they compress the posterior capsule, shifting the femur forward onto the tibia. Supine wall Pilates variations unload body weight from the spine and hips, enabling you to stretch the posterior chain while strengthening the hamstrings isometrically. This restores balanced anterior-posterior tension across the joint.
3. The Gluteus Medius and the Valgus Collapse Vector
Most bad knees are actually victims of dysfunctional hips. When the gluteus medius is weak, the femur rotates inward and adducts during movement, a catastrophic biomechanical flaw known as dynamic knee valgus. Dynamic valgus dramatically increases the Q-angle of the knee, placing heavy lateral stress on the patella and stretching the medial collateral ligament (MCL). By anchoring the back against a wall, Pilates side-support movements activate the gluteus medius in an unweighted environment, correcting the structural root cause of lateral knee pain.
Equipment and Environmental Setup for Knee Safety
Before beginning your wall Pilates sequence, proper environmental preparation is critical to avoid accidental slips or improper joint angles that could trigger acute pain. Wall Pilates requires minimal gear, but selecting the right surfaces ensures safe, pain-free movement.
- Wall Surface: Choose a clean, unobstructed drywall surface, sturdy interior door, or smooth wood-paneled wall. Avoid textured walls that could abrade bare skin during dynamic slide variations.
- Floor Friction Interface: Use a high-density, non-slip yoga mat (at least 5mm to 8mm thick). A thin mat provides insufficient cushioning for the sacrum and spine during supine exercises, while an overly soft memory-foam mat can destabilize the heels during bridging.
- Footwear Considerations: Perform this routine either completely barefoot or wearing specialized grip socks featuring silicone tread patterns. Standard socks on hardwood or laminate flooring introduce severe slipping hazards that can reflexively wrench the knee joint.
- Supportive Props: Keep a small foam Pilates ball (7 to 9 inches, partially deflated) or a folded yoga block nearby. Placing this between your inner thighs during bridging engages the adductors, reinforcing the VMO and keeping the knees from drifting inward or outward.
To guarantee your knee stays safe during wall slides, check that your shin bones remain strictly vertical to the floor at all times. If your knees travel forward over your toes, your feet are positioned too close to the baseboard. Step your feet forward approximately 18 to 24 inches from the wall so that at the bottom of your movement, your knees sit directly above your heels at an angle never exceeding 45 degrees.
The 15-Minute Wall Pilates Protocol for Bad Knees
This 15-minute routine is structured as an integrated clinical sequence divided into five distinct 3-minute blocks. Each block pairs focused muscle engagement with restorative joint decompression. Spend 45 seconds performing the movement deliberately, take 15 seconds to rest and reset, and repeat for three complete rounds before transitioning smoothly to the next exercise.
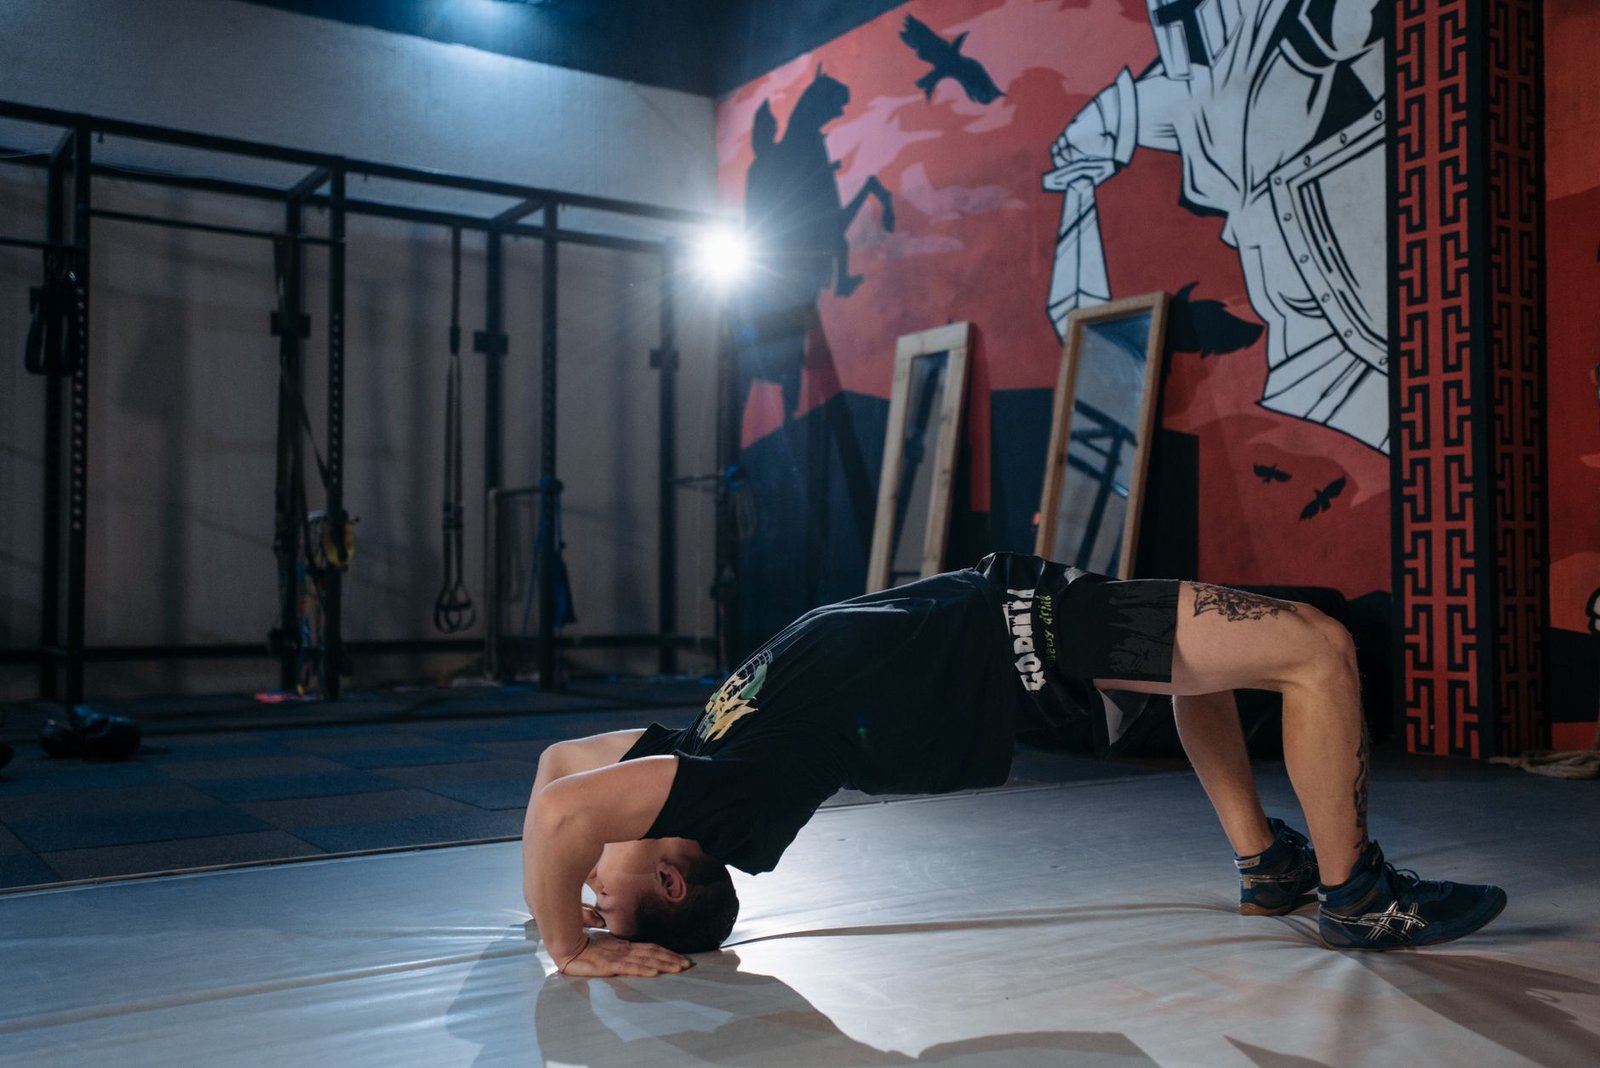
Exercise 1: The Wall-Supported Isometric Chair Hold (Minutes 0:00 – 3:00)
This exercise builds robust quadriceps endurance and activates the vastus medialis oblique without generating damaging patellar friction. By holding a shallow, static angle against the wall, you build muscular strength without joint grinding.
- Setup: Stand with your back flat against the wall, feet positioned shoulder-width apart, placed 18 to 24 inches out from the baseboard. Press your entire spine, from your sacrum up to your shoulder blades, firmly into the flat surface.
- Execution: Inhale deeply, engage your transverse abdominis, and exhale as you slowly slide your back down the wall. Descend only until your knees reach a gentle 30 to 45-degree angle. Do not descend to a 90-degree angle.
- Alignment Cue: Drive down through your heels and press your big toes firmly into the mat. Focus on squeezing your inner thighs gently inward toward an imaginary centerline to fire the inner quads. Hold for 45 seconds, then use your hands against the wall to assist yourself back up. Rest 15 seconds and repeat for 3 rounds.
Exercise 2: Supine Wall Glute Bridge (Minutes 3:00 – 6:00)
Glute bridges executed with the feet elevated on a wall relieve retropatellar compression entirely. This orientation shifts the gravitational load away from the knee joint, channeling pure mechanical tension directly into the gluteus maximus and deep hamstring complex.
- Setup: Lie flat on your back on your mat with your buttocks approximately 18 to 24 inches away from the wall. Bend your knees and place the soles of your bare feet flat against the wall, hip-width apart, so your knees create a comfortable 90-degree angle.
- Execution: Rest your arms alongside your torso, palms facing down. Exhale, tilt your pelvis into an imprint (posterior pelvic tilt), and peel your spine up off the floor one vertebra at a time until your hips, knees, and shoulders form a straight line.
- Alignment Cue: Do not flare your ribs or overarch your lumbar spine. Push straight into the wall with your heels rather than pushing downward toward the floor. Squeeze your glutes tightly at the apex for two seconds, then roll back down slowly. Repeat for 45 seconds, rest 15 seconds, for 3 rounds.
Exercise 3: Wall-Assisted Straight-Leg Quadriceps Lifts (Minutes 6:00 – 9:00)
The straight-leg lift is an orthopedic classic because it delivers zero patellofemoral compressive force. Performing this exercise with the non-working foot supported by the wall stabilizes the pelvis, isolating the rectus femoris and hip flexors safely.
- Setup: Lie on your back with your left knee bent and the sole of your left foot planted flat against the wall for support. Extend your right leg straight out on the mat with your foot dorsiflexed (toes pulled back toward your shin).
- Execution: Tighten the quadriceps of your right leg until the knee is fully extended. Inhale, then exhale as you lift the right leg smoothly until your right thigh runs parallel to your left thigh.
- Alignment Cue: Hold the right leg at the top for a distinct one-second count, focusing on tightening the inner quad muscle. Slowly lower the leg back down until your heel hovers just one inch above the floor, then lift again immediately. Alternate legs each round (Round 1: Right, Round 2: Left, Round 3: Split 20s each side).
Exercise 4: Lateral Wall Hip Abduction Slides (Minutes 9:00 – 12:00)
A primary driver of chronic knee pain is hip abduction deficiency. When the hip abductors fail to fire, the knee collapses inward under stress. This side-lying wall exercise isolates the gluteus medius, providing the lateral stability necessary to keep the patella tracking cleanly.
- Setup: Lie on your right side with your back, buttocks, and the back of your heels flush against the wall. Rest your head comfortably on your outstretched right arm. Bend your bottom (right) knee slightly to 45 degrees for stability, keeping your top (left) leg completely straight.
- Execution: Flex your left foot and slide your left heel slowly up the surface of the wall, keeping the back of your heel in constant contact with the wall. Lift the leg only about 30 to 45 degrees.
- Alignment Cue: Do not allow your pelvis to roll backward or your hip to hike toward your ribs. The continuous contact of your heel against the wall forces the gluteus medius to perform the work, preventing the tensor fasciae latae (TFL) from taking over. Complete 45 seconds on one side, rest, swap sides for the second round, and split the third round.
Exercise 5: Supine Wall Calf-Hamstring Deceleration Pumps (Minutes 12:00 – 15:00)
The gastrocnemius crosses the posterior knee joint and plays a pivotal role in dynamic stabilization. This closing exercise restores fluid circulation, pumps out joint congestion, and gently lengthens the posterior chain tissues without joint strain.
- Setup: Lie on your back and extend both legs up the wall so that your hips are 12 to 18 inches away from the baseboard and your heels rest lightly against the vertical surface. Your knees should maintain a soft, micro-bend.
- Execution: Keeping your heels supported on the wall, slowly point your toes upward toward the ceiling (plantarflexion), feeling your calf muscles engage. Hold for one second, then slowly pull your toes downward toward your shins (dorsiflexion), feeling a gentle stretch through your calves and hamstrings.
- Alignment Cue: Breathe slowly and rhythmically. Inhale as you point, exhale as you flex. This controlled movement acts as a vascular pump, moving lymph and venous blood away from the lower limbs while gently restoring range of motion. Complete 3 sets of 45 seconds with 15 seconds of rest.
Never work through sharp, stabbing, or pinching joint sensations. While a mild muscular burn in the quadriceps and glutes is safe and desirable, any sharp sensation directly under the patella or along the joint line indicates dangerous mechanical shearing. If this occurs, immediately reduce your depth of flexion, back away from the wall, or switch to the alternative unweighted supine modifications. Individuals with acute meniscal tears or severe Grade IV osteoarthritis should consult their physical therapist before performing weight-bearing wall holds.
Modifications and Progressions for Degenerative Conditions
Clinical exercise programming must adapt dynamically to your personal joint condition. Not all bad knees stem from the same root pathology. An individual with an inflamed patellar tendon requires an entirely different set of movement constraints than someone navigating bone-on-bone osteoarthritis or recovering from an old ACL reconstruction.
Modifications for Patellofemoral Pain Syndrome (Runner’s Knee)
If your primary symptom is pain under or around the kneecap that intensifies when sitting for long periods or walking downstairs, patellar tracking is your core issue. Modify Exercise 1 (Isometric Chair Hold) by placing an 8-inch Pilates ball between your knees. Squeeze the ball with roughly 30 percent of your maximal effort throughout the entire hold. This isometric hip adduction activates the vastus medialis oblique, pulling the patella away from the inflamed lateral femoral condyle.
Modifications for Tibiofemoral Osteoarthritis
Osteoarthritis involves the gradual breakdown of hyaline cartilage, often accompanied by osteophyte formation and joint space narrowing. For individuals with moderate-to-severe joint degeneration, deep flexion must be completely avoided. Limit all knee flexion angles across the entire routine to a maximum of 30 degrees. If lying on the floor causes hip stiffness or vertigo, you can perform Exercise 2, 3, and 5 elevated on a firm bed pushed directly against a secure wall.
Progressions for Post-Rehabilitation and Joint Longevity
Once you can perform this 15-minute routine four times a week for three consecutive weeks with zero post-exercise joint soreness, you can gradually introduce higher mechanical demands. Progress Exercise 1 by extending the hold to 60 seconds or performing the hold with single-leg taps. Progress Exercise 2 by lifting one foot one inch off the wall at the top of the bridge, turning the movement into an isometric single-leg stability drill that challenges deep pelvic balance.

Neuromuscular Re-Education: Fixing the Movement Chain
Joint pain does not exist in isolation; it profoundly alters motor unit recruitment strategies throughout the entire body. When a knee joint hurts, the motor cortex in your brain actively rewires movement patterns to protect the injury, a phenomenon known as compensatory motor guarding. You might shift your center of gravity toward your healthy leg, twist your pelvis, or lock your ankle joints. Over time, these compensatory patterns become ingrained motor habits that persist long after local tissue inflammation subsides.
Wall Pilates acts as an objective neurological mirror. The wall provides an unyielding tactile reference plane that instantly reveals physical asymmetries. If your pelvis tilts, one glute fires late, or your weight drifts onto your forefoot, the physical contact against the wall provides instant sensory feedback. This immediate tactile data enables you to self-correct your posture, recalibrating the motor cortex and restoring proper muscle firing sequences across the kinetic chain.
Pairing these physical alignment exercises with focused breathing protocols enhances overall autonomic recovery. When your nervous system remains stuck in a chronic fight-or-flight state, tissue healing slows and muscular tension spikes. Practicing structured movement alongside mindful breathing routines, such as a 10-minute somatic morning routine for vagus nerve regulation and high cortisol relief, down-regulates sympathetic drive. This calming effect reduces tone in hypertonic hip flexors and IT bands, taking excessive strain off vulnerable knee joints.
The 4-Week Knee Restoration Blueprint
Rebuilding joint integrity requires disciplined, progressive physiological adaptation. Connective tissues, including tendons, ligaments, and cartilage, adapt at a slower rate than skeletal muscle due to their limited vascular networks. Follow this structured 4-week adaptation timeline to safely rebuild lower-body strength and joint stability.
Week 1: Proprioceptive Adaptation and Neuromuscular Awakening
Your objective during the first week is to master form without provoking any post-exercise inflammation. Perform the 15-minute protocol three days per week (e.g., Monday, Wednesday, Friday). In Exercise 1, limit your knee flexion to a gentle 25 to 30 degrees. Focus entirely on feeling your heels press into the ground, your spine imprint against the wall, and your transverse abdominis engage. If you notice any mild swelling or heat in the knee joint after your session, apply a cold pack for 15 minutes and expand your resting angles during the next workout.
Week 2: Increasing Time-Under-Tension and Glute Engagement
During the second week, increase frequency to four sessions per week (Monday, Tuesday, Thursday, Saturday). With your movement pathways established, focus on sustained time-under-tension. In Exercise 2 (Supine Wall Bridge), pause for a full three-second isometric contraction at the top of every repetition. Squeeze your glutes deliberately to actively inhibit the overactive hip flexors through reciprocal inhibition, relieving chronic tension along the front of your thighs.
Week 3: Refining Alignment and Hip Abductor Strength
Week 3 focuses on correcting dynamic knee valgus. In Exercise 4 (Lateral Wall Slides), pay meticulous attention to keeping your heel pinned to the wall throughout the entire movement. Notice if your foot wants to drift forward into internal rotation. This drift is a classic sign of the tensor fasciae latae attempting to hijack the movement from a weak gluteus medius. Correct this by pointing your toes slightly downward toward the floor (internal hip rotation with abduction), which isolates the gluteus medius fibers that support proper patellar tracking.
Week 4: Consolidating Stability and Functional Transfer
In the final week of your introductory phase, focus on controlled transitions and deep breathing mechanics. You will notice that the 30-degree isometric chair hold feels significantly easier and that your knees feel lighter and more stable during daily activities like walking down stairs. At this point, the baseline strength you have developed provides a strong foundation. You can now safely integrate complementary supportive practices, such as working with 7 best somatic therapy tools to regulate your nervous system at home, to support muscular relaxation and long-term functional mobility.
Integrating Wall Pilates with Long-Term Joint Health
While targeted wall Pilates exercises effectively restore local joint stability, maintaining healthy joints over a lifetime requires a comprehensive lifestyle approach. Your articular cartilage and connective tissues respond to nutrition, systemic inflammation, and daily movement habits. Combining your 15-minute wall Pilates sessions with supportive lifestyle strategies creates an ideal internal environment for joint comfort and mobility.
First, evaluate your nutritional foundation. Collagen synthesis within tendons and ligaments depends on adequate dietary amino acids like glycine, proline, and hydroxyproline, along with vitamin C as an essential enzymatic cofactor. Ensuring adequate protein intake alongside anti-inflammatory omega-3 fatty acids helps soothe joint tissues after physical activity. Proper hydration is equally vital; because cartilage relies on passive fluid diffusion, systemic dehydration reduces the shock-absorbing capacity of your synovial fluid, increasing micro-friction during movement.
Second, examine your daily movement patterns outside of dedicated exercise sessions. Prolonged, uninterrupted sitting keeps the knees bent at 90 degrees for hours, maintaining continuous static pressure across the patellofemoral cartilage. Make it a habit to stand up, straighten your legs, and perform gentle, unweighted heel pumps every 45 to 60 minutes. Combining these healthy movement habits with your structured 15-minute wall Pilates routine will keep your knees protected, resilient, and functioning smoothly for years to come.
Frequently Asked Questions
Can wall Pilates worsen my knee pain if I already have osteoarthritis?
When performed using proper alignment and controlled angles, wall Pilates is widely recognized by physical therapists as one of the safest exercise modalities for knee osteoarthritis. The primary cause of exercise-induced arthritic pain is compressive shear stress across thinned articular cartilage. Wall Pilates directly prevents this by maintaining closed-kinetic-chain contact, which co-contracts the quadriceps and hamstrings to hold the joint in stable alignment. However, you must avoid deep flexion angles. Keeping your knee flexion between 30 and 45 degrees protects the joint capsule while circulating synovial fluid to lubricate stiff cartilage. If you experience persistent discomfort, stop the movement and check that your feet are placed far enough forward from the baseboard.
How is wall Pilates different from standard mat Pilates for individuals with bad knees?
Standard mat Pilates relies heavily on gravity and open-kinetic-chain leg extensions, where the feet move freely through the air. For someone with joint instability, patellar tracking issues, or torn cartilage, moving the legs through space without a foot anchor can generate significant shearing forces across the knee joint. Wall Pilates introduces an unyielding vertical surface that provides continuous sensory feedback while turning movements into closed-kinetic-chain exercises. This physical anchor allows you to recruit your glutes, hamstrings, and deep core muscles without requiring the knee joint to absorb unbalanced gravitational loads.
How many times per week should a beginner complete this 15-minute routine?
Beginners should perform this 15-minute routine three to four times per week on non-consecutive days (such as Monday, Wednesday, Friday, and Sunday). Tendons, ligaments, and cartilage are avascular tissues that adapt more slowly to exercise than skeletal muscle. Providing a 24- to 48-hour recovery window between sessions allows joint tissues to adapt, recover, and absorb fresh synovial fluid. Once you have built strong baseline stability over four to six weeks, this sequence can easily be performed five days per week as a restorative morning mobility practice.
What should I do if my knees make a clicking or popping noise during the exercises?
Painless clicking, popping, or crackling in the knee is known clinically as physiological crepitus. In most cases, this sound is completely harmless; it is caused by tiny gas bubbles shifting within the synovial fluid or soft tissue structures gliding gently over bony prominences. If the clicking is entirely painless, you can safely continue your routine. However, if the clicking is accompanied by sharp pain, sudden warmth, or a sensation that the joint is catching or giving way, stop immediately. These symptoms can indicate a mechanical disruption, such as a meniscus tear or loose cartilage fragment, which should be evaluated by an orthopedic specialist.
Do I need special shoes or grip socks to perform wall Pilates safely?
You should never perform wall Pilates in standard socks on smooth surfaces like hardwood, tile, or laminate flooring. Doing so creates a serious slip hazard, and any sudden loss of foot traction can reflexively torque the knee joint. The safest approach is to exercise barefoot on a clean, non-slip rubber yoga mat. Exercising barefoot strengthens the intrinsic muscles of the foot and improves sensory feedback through your soles. If you prefer to wear foot coverings, invest in high-quality grip socks featuring textured silicone tread across the soles to ensure absolute stability against both the floor and the wall.